To effectively support overhead anchors for your home gym equipment, it’s crucial to ensure your ceiling joist spacing does not exceed 24 inches apart, with an ideal spacing of 16 inches on center. This configuration maximizes load capacity, particularly for heavier gym equipment. For standard loads, use at least 2×6 joists, and consider upgrading to 2×8 or larger joists for equipment exceeding 100 lbs. Always secure your anchors properly, and make it a habit to inspect them regularly to maintain safety during your workouts. Additionally, there are more strategies you can explore to enhance stability and ensure your home gym is both safe and effective for your fitness journey.
Key Takeaways
- When setting up your home gym, ensure that ceiling joists are spaced no more than 24 inches apart to effectively support any overhead anchors for exercise equipment.
- For optimal stability when installing heavier gym equipment, joists should ideally be spaced 16 inches on center.
- The minimum joist size suitable for residential loads is 2×6, but for equipment weighing over 100 lbs, consider using larger joists like 2×8 for added support.
- Secure your overhead anchors with screw eye bolts that penetrate at least 2 inches into the joist to ensure stability during workouts.
- Regularly inspect your joist connections and overhead anchors to maintain safety and ensure the structural integrity of your home gym setup.
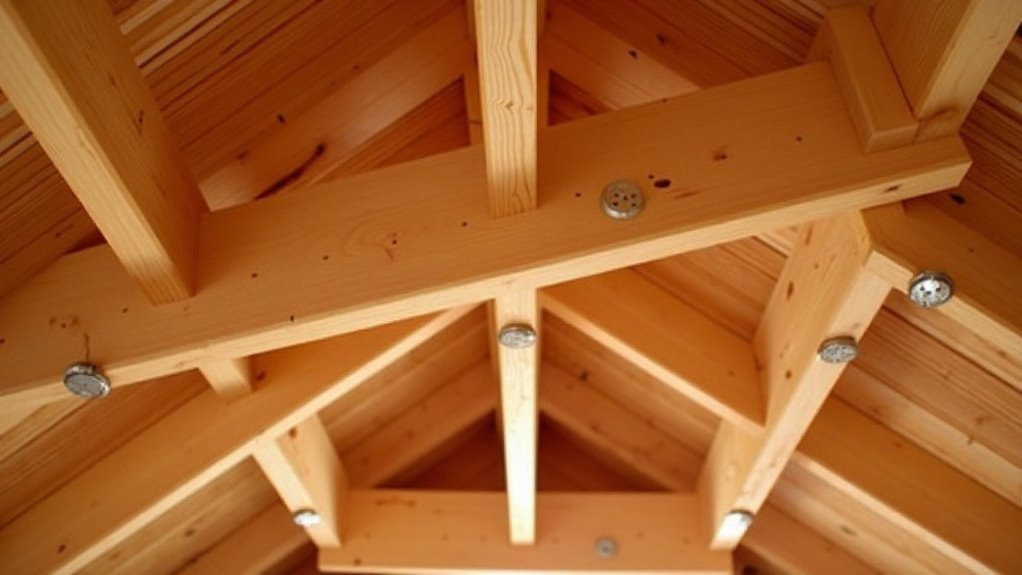
Understanding Ceiling Joist Spacing
When planning to install overhead anchors for your home gym equipment, understanding ceiling joist spacing is crucial, as it directly impacts the load-bearing capacity of your ceiling structure.
Typically, joists are spaced 16 to 24 inches apart, with 16 inches on center providing ideal support for your workout gear. The minimum joist size for standard loads generally starts at 2×6 dimensions, but for heavier equipment or additional stress, consider using 2×8 or larger joists.
Joists should ideally be spaced 16 inches apart, with 2×6 as the minimum size for standard loads.
Always secure anchors directly into the center of the joists to maximize load-bearing capacity and minimize structural damage, ensuring a safe and stable setup for your workouts.
Adhering to spacing guidelines guarantees you maintain the maximum load capacity for safe installations, allowing you to focus on your fitness goals without worry.
Recommended Joist Sizes for Load Support
Selecting the appropriate joist size is essential for ensuring your home gym equipment can be safely supported as you work towards your fitness goals.
For standard residential applications, ceiling joists should be a minimum of 2” x 6” to handle typical weight loads, supporting a maximum load of approximately 10 pounds per square foot.
It’s vital to space these joists no more than 24 inches apart for effective load support, especially when installing pull-up bars or other overhead anchors.
If your home gym setup involves heavier equipment exceeding 100 lbs, consider using 2” x 8” joists or larger.
Additionally, assess the span; longer spans may require larger joist sizes or additional supports to maintain structural integrity, ensuring a safe and effective workout environment.
Techniques for Locating Ceiling Joists
To effectively set up your home gym, it’s important to locate ceiling joists for secure equipment installation. You can employ several techniques for this task.
Using a stud finder allows for precise detection of framing members, ensuring that your pull-up bar or suspension training system is safely anchored.
The knocking method can help you differentiate between solid and hollow sounds, indicating where the joists are located.
Additionally, magnetic detection can identify screws or nails in the drywall, providing a cost-effective alternative for finding joists.
This way, you can confidently install your gym equipment and create a safe and effective workout space at home.
Knocking Method
When setting up your home gym and installing overhead anchors, accurately locating ceiling joists is crucial for ensuring proper support for your equipment. The knocking method is an effective technique for this purpose.
Follow these steps:
- Gently tap on the ceiling using your knuckles.
- Listen for solid sounds, which indicate you’re over a joist and can safely install your anchors.
- Pay attention to hollow sounds, suggesting gaps between joists, typically spaced 16 to 24 inches apart.
- Mark the locations where you hear solid sounds, and then measure 16 or 24 inches to locate additional joists for optimal support.
Stud Finder Use
After exploring the knocking method for locating ceiling joists, using a stud finder can further enhance accuracy in this task, especially if you’re setting up a home gym. A stud finder detects density changes in drywall, indicating where the framing is located, which is crucial for safely mounting gym equipment. Most ceiling joists are spaced 16 or 24 inches apart, so knowing this can optimize your scanning. To use the tool effectively, calibrate it against a clear ceiling area before starting. Move it slowly across the surface until it indicates a joist with a light or beep, ensuring a secure installation for your equipment.
| Step | Action | Purpose |
|---|---|---|
| 1 | Calibrate | Guarantee accurate detection of joists for secure mounting |
| 2 | Move slowly | Improve locating precision to avoid misplacement |
| 3 | Identify solid vs. hollow | Confirm joist location for optimal equipment stability |
Magnetic Detection Technique
Utilizing a magnetic detection technique can greatly enhance your ability to locate ceiling joists accurately, which is essential when installing gym equipment at home.
Here’s how to effectively use magnetic detection tools for your home gym setup:
- Move a magnetic stud finder slowly across the ceiling to locate joists where you can securely mount equipment.
- Identify metal fasteners or nails in the drywall, which indicate the locations of the joists.
- Determine the spacing of joists, typically 16 or 24 inches apart, to ensure you choose the right anchor points for your equipment.
- Mark detected edges to guarantee accurate placement for secure anchors, ensuring your fitness gear is safely installed.
This method not only helps you find joists but also ensures reliable structural support for overhead anchors, especially important when hanging heavy items like pulleys or suspension trainers.
Avoid relying solely on drywall for anchoring; proper joist detection is essential for a safe and effective home gym setup.
Best Practices for Securing Overhead Anchors
To ensure the safety and stability of your overhead anchors for home gym equipment, it’s crucial to follow best practices during installation.
First, verify that ceiling joists are spaced no more than 24 inches apart to prevent structural failure under the weight of your equipment. For secure connections, use screw eye bolts with at least 2 inches of penetration for each lag screw into the joists.
Ensure ceiling joists are spaced within 24 inches and use screw eye bolts with 2 inches of penetration for secure connections.
If you’re planning to hang heavier equipment exceeding 100 lbs, consider adding blocking or sistered joists to enhance load-bearing capacity and ensure a safe workout environment.
Regular inspections of your overhead anchors and their connections are essential to maintain safety and prevent accidents, ensuring your home gym remains a reliable space for your fitness journey.
Load-Bearing Capacity of Ceiling Joists
Understanding the load-bearing capacity of ceiling joists is crucial when planning to install overhead anchors for your home gym equipment.
Whether you’re setting up for weightlifting, resistance training, or other fitness activities, consider these key factors to ensure safety and stability:
- Spacing: Ceiling joists are typically spaced 16 to 24 inches apart, so be sure to identify their layout.
- Support: For a 16-foot span of 2×6 joists, the support capacity is about 10 pounds per square foot. This is important to know when calculating the weight of your gym equipment.
- Deflection Limit: The allowable sag is 1/16 of the span, which is essential for maintaining the structural integrity of your ceiling while using heavy equipment.
- Reinforcement: Sistering new joists can significantly enhance load-bearing capacity, potentially tripling it. This is particularly beneficial for those planning to use heavy items or equipment in their home gym.
Reinforcement Strategies for Enhanced Stability
To enhance the stability of your home gym setup, consider sistering additional ceiling joists, which can significantly increase the load-bearing capacity for heavy equipment.
Implementing blocking between joists provides a solid foundation for mounting items like pull-up bars or resistance bands, ensuring weight is distributed evenly.
These reinforcement strategies not only improve structural integrity but also promote safety during your workouts, allowing you to focus on achieving your fitness goals at home.
Sistering Joists for Strength
While many homeowners may overlook the importance of reinforcing their home gym structures, sistering joists can significantly enhance the load-bearing capacity and overall stability of equipment support systems.
To effectively implement sistering in your home gym, consider these strategies:
- Use joists equal to or larger than existing ones, such as 2x8s with 2x6s, to support heavier gym equipment.
- Securely fasten sistered joists with screws and glue to ensure the safety and durability of your workout space.
- Stagger the placement of plywood between sistered joists to distribute the weight of gym equipment evenly.
- Aim for properly installed sistered joists, which can triple the load-bearing capacity, making your home gym safer for intense workouts.
Blocking for Stability
When you’re setting up your home gym, enhancing the stability of your overhead anchor points is crucial for safe and effective workouts. Blocking plays a significant role in providing the necessary support for your gym equipment.
Blocking consists of short framing pieces installed between ceiling joists, which are essential for effective load distribution and preventing sagging of your equipment. For optimal strength, install blocking perpendicular to the joists, ensuring a secure fastening area, especially for heavier equipment like pull-up bars or suspension trainers.
Accessing the attic allows for versatile installation orientations, while below-ceiling installation requires careful cutting and adherence to structural standards to ensure safety.
Regularly inspecting the blocking and its connections is fundamental for maintaining the safety and integrity of your overhead installations, keeping your home gym secure and functional for all your fitness routines.