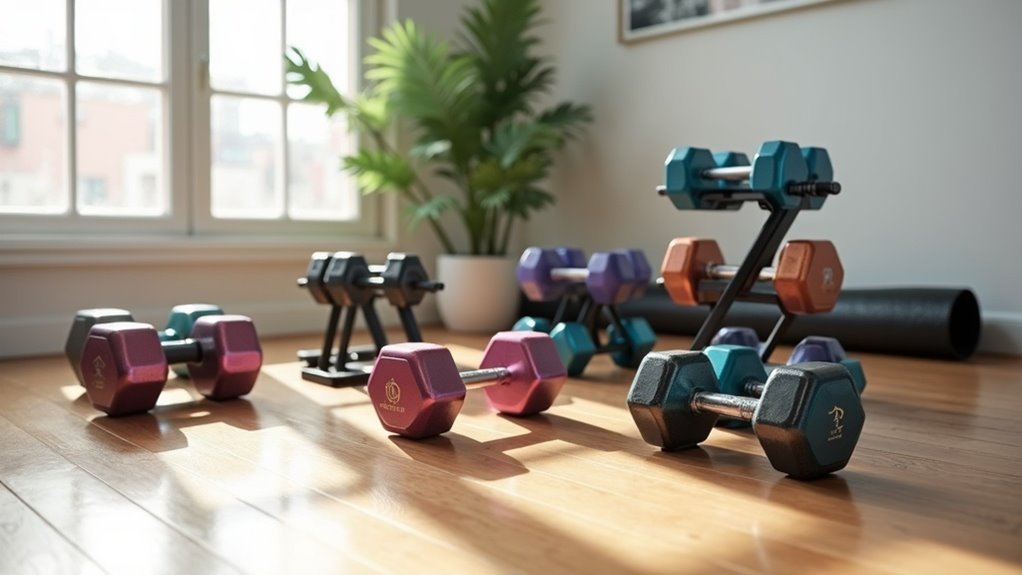
To fix gaps in your interlocking floor tiles in your home gym, begin by vacuuming the area to ensure it’s clean and dry. Use double-sided carpet tile tape for a strong hold that allows for easy adjustments, especially in a space where you might move equipment around. Prepare a wood block to gently tap the tiles into place. Place the tape under the gap, press down firmly, and use the block to nudge any loose tiles snugly together. Once you’ve cleaned up, check for stability and any remaining gaps. Want to learn more about achieving a flawless finish in your workout space?
Key Takeaways
- Start by identifying and inspecting the locations of gaps in your interlocking floor tiles to ensure a safe and stable workout environment in your home gym.
- Gather the necessary repair tools, which include carpet tile tape, a wood block, and a rubber mallet, to effectively close those gaps and maintain a smooth surface for your fitness routine.
- Before beginning repairs, clean the area thoroughly to remove any debris or dirt that could hinder tile adhesion and disrupt your workout space.
- Use the wood block to apply even pressure on the tiles, gently tapping with the rubber mallet to close gaps without damaging the surface, ensuring a solid foundation for your exercises.
- Make it a habit to regularly check and maintain your tiles to guarantee their stability and to prevent future gaps from forming, helping you stay focused on your fitness goals.
What You’ll Need
To fix gaps in your interlocking floor tiles, essential tools will ensure a smooth repair process, especially for your home gym setup.
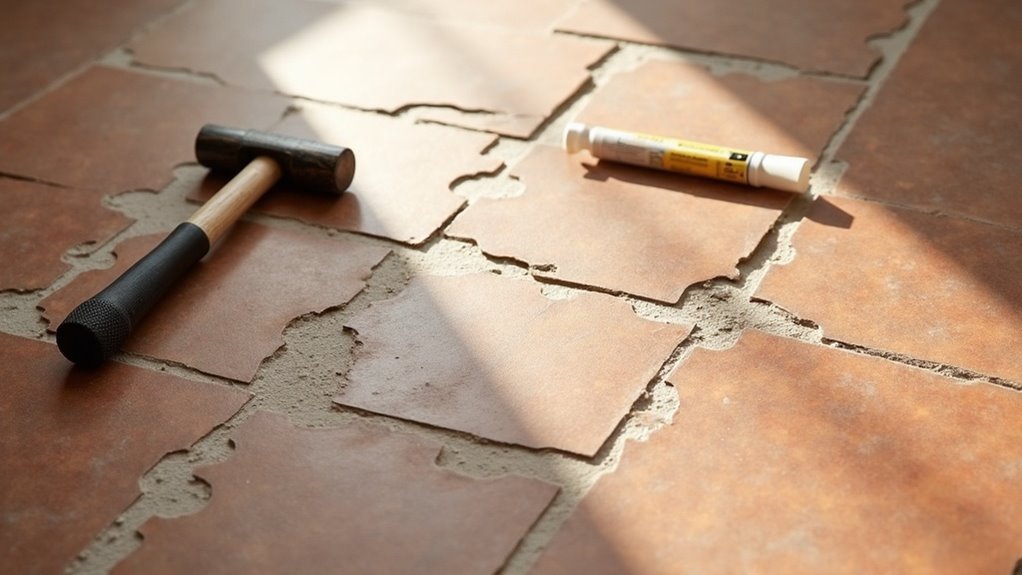
Start with Carpet Tile Tape for a strong hold and easy removal. A rubber mallet or small hammer can gently nudge tiles back into place without causing any damage, preserving the integrity of your workout area.
Begin with Carpet Tile Tape for a secure grip, and use a rubber mallet to gently reposition tiles without damage.
Use a wood block, ideally 2×4 or 4×4, to apply pressure and effectively close those pesky flooring gaps, ensuring a stable surface for your exercises.
Keep a utility knife or scissors handy for cutting the tape into manageable strips.
Optionally, a vacuum and small brush can help clear dust and debris, ensuring better tape adhesion for a lasting fix.
A well-maintained floor is essential for a safe and effective home gym experience!
Why Use Double-Sided Carpet Tile Tape for This Repair
After gathering the necessary tools, understanding the benefits of using double-sided carpet tile tape can enhance your home gym setup.
This tape provides a strong hold specifically designed for flooring, ensuring your interlocking gym tiles stay secure while you fill any gaps. Its controlled, temporary grip minimizes the risk of long-term damage or unsightly marks that adhesives or pry bars can leave behind.
Additionally, the residue-free removal protects your click-lock seams, preserving the integrity of your workout space. With this user-friendly method, you can quickly and accurately tap planks together for precise adjustments, making it a perfect solution for maintaining your home gym environment.
Step-by-Step: How to Fix Gaps in Interlocking Floor Tiles
To fix gaps in your interlocking floor tiles in your home gym, start by identifying where the gaps are located to ensure a safe workout space.
Next, gather your repair tools, such as tile adhesive or filler, to guarantee you’re prepared for the task.
Finally, apply the appropriate techniques to close those gaps effectively, ensuring your flooring remains safe and aesthetically pleasing while you focus on your fitness routine.
Identify Gap Locations
When setting up your home gym, it’s crucial to ensure that your interlocking floor tiles are properly installed to create a safe and effective workout environment.
Start by thoroughly inspecting the entire area for visible gaps, especially around corners and edges where misalignment might occur.
Pay attention to:
- Uneven surfaces by using a level or straightedge to ensure stability during your workouts.
- Loose tiles that shift when stepped on, indicating they may need to be repositioned for safety.
- Obstructions that could interfere with the locking mechanism, potentially leading to injuries.
Additionally, keep in mind that temperature changes can cause tiles to expand or contract, particularly in tight spaces.
Identifying these gap locations will help you maintain a solid and secure foundation for your home gym, allowing you to focus on your fitness goals without distraction.
Prepare Repair Tools
Before diving into your home gym setup, it’s essential to gather the right tools to tackle any gaps in your interlocking floor tiles.
You’ll need Carpet Tile Tape, a rubber mallet or small hammer, a wood block (2×4 or 4×4), and a utility knife or scissors.
Start by cleaning the work area to ensure proper adhesion for your workout flooring.
Prepare the wood block by cutting it to the width of a tile and lightly sanding one side.
Cut strips of Carpet Tile Tape about 6 inches long, attach them to the sanded block, and peel off the backing.
You’re now ready to secure your gym floor and create a safe, effective space for your home workouts!
Apply Repair Techniques
With your tools ready and the workout space clean, it’s time to apply the repair techniques for fixing gaps in your interlocking floor tiles in your home gym.
Start by cleaning the gaps thoroughly to guarantee a solid grip for the Carpet Tile Tape.
- Prepare a wood block, sand one side for smooth tapping to ensure a comfortable workout environment.
- Cut strips of double-sided Carpet Tile Tape, attach them to the block.
- Position the block on the plank and gently tap with a rubber mallet to close the gaps, keeping your flooring safe for exercise.
Finally, lift the block to check alignment before replacing baseboards.
Your home gym flooring will look seamless and be ready for your fitness routine once again!
Prepare the Area
To start preparing the area for fixing gaps in your interlocking floor tiles, it’s important to create a clean and organized workout space.
Begin by vacuuming the surrounding area and using a small brush to eliminate any dirt or debris that could interfere with your repair efforts.
Keeping the space dry is crucial, especially in a home gym setting, so avoid using liquid cleaners during this process to ensure a safe and effective environment for your exercise routine.
Clean Surrounding Area
Cleaning the surrounding area of your home gym is crucial for ensuring that your equipment is safe, functional, and set up for optimal performance.
Begin by vacuuming and using a small brush to clear away dust and debris from the floor and surrounding surfaces. A clean environment not only enhances the aesthetics of your gym but also contributes to the longevity of your equipment.
Here are some essential tips to consider:
- Avoid using liquid cleaners, as they can introduce moisture that may affect your equipment.
- Ensure that the area is completely dry and free from dirt for the best results when setting up your gym.
- Regularly check for any loose flooring or damage that could impact your workout experience.
Remove Debris Thoroughly
After ensuring your home gym is clean and organized, it’s time to focus on removing debris from the gaps in your interlocking floor tiles.
Grab a vacuum and a small brush to meticulously clear all dirt and debris from the gaps and surrounding areas. This step is crucial for achieving a clean surface that allows maximum grip for any adhesive or tape you’ll use later during your workouts.
Avoid liquid cleaners, as moisture can create further issues. Pay extra attention to corners and edges where debris tends to accumulate, ensuring your flooring remains intact and visually appealing for the long term, allowing you to stay healthy and motivated in your home exercise routine.
Prepare the Wood Block
Before you start fixing the gaps in your interlocking floor tiles in your home gym, it’s essential to prepare a sturdy wood block that will serve as your pressure tool.
Follow these steps to ensure it’s ready for the task:
- Cut a piece of wood to match the width of one interlocking tile, making sure it’s strong enough to withstand tapping pressure without breaking.
- Lightly sand one side for a smooth surface to prevent any damage to your flooring while you’re working out.
- Confirm the block is easy to handle, allowing you to maneuver it effectively while closing those gaps, ensuring a safe and stable workout environment.
With this prepared wood block, you’ll be set for a successful repair, keeping your home gym in top shape!
Apply the Carpet Tile Tape
To effectively secure your interlocking floor tiles in your home gym, applying carpet tile tape is a crucial step that ensures a strong bond between the tiles.
Begin by cutting strips of double-sided tape to about 6 inches in length. Attach the tape to the sanded side of your wooden block, then peel off the top paper backing.
Position the exposed adhesive on the plank that needs adjustment. Press the block firmly onto the plank to ensure proper adherence. Gently tap laterally on the block to close any gaps, while also remembering to maintain an expansion gap for your floating floors.
This will help create a stable and safe environment for your workouts at home.
Clean Up and Check Your Work
Once you’ve finished installing your interlocking floor tiles in your home gym, it’s crucial to clean up and check your work for a flawless finish.
After installing your interlocking floor tiles, ensure to clean up and inspect your work for a perfect finish.
Follow these steps to ensure your flooring product enhances your workout space:
- Gently lift the wood block to confirm the tiles are securely locked in place for safety during exercise.
- Walk over the repaired area to verify the tiles are even and securely interlocked, providing a stable surface for your workouts.
- Inspect for any remaining gaps and reattach any removed baseboards or connector pieces to maintain a polished look.
Taking these steps will help you achieve a seamless appearance in your home gym and support your fitness journey for years to come.
Why This Method Works So Well
After ensuring your interlocking gym floor tiles are securely in place and free of gaps, let’s delve into why this method is particularly effective for your home workout space. The solution you’ve used harnesses the click-lock design, enabling quick horizontal adjustments without the need for bulky tools. The use of Carpet Tile Tape provides the essential grip, while the gentle tapping technique minimizes any potential damage to the tiles. Maintaining a clean surface is crucial to prevent debris from interfering with the locking mechanism. This fast and repeatable approach ensures your home gym floor remains in excellent condition, efficiently addressing any gaps as they arise.
| Key Feature | Benefit | Importance |
|---|---|---|
| Click-lock design | Easy adjustments | Reduces labor and tools needed |
| Carpet Tile Tape | Strong grip | Secures tiles without damage |
| Tapping technique | Precise repositioning | Minimizes risk of flooring damage |
| Clean surface focus | Prevents debris interference | Maintains locking mechanism |
| Fast, repeatable method | Efficient ongoing maintenance | Keeps floor gaps at bay |