To anchor a wall-mounted folding rack in your home gym, begin by selecting a location that offers ample space and a sturdy wall. Use a stud finder to locate steel studs and mark their positions for optimal support. Prepare spacer blocks for alignment, and choose the appropriate fasteners such as lag bolts or masonry screws, depending on your wall type. After installing and securing the mounting boards, make final adjustments to ensure everything is tightly fastened. Remember, understanding the importance of proper load management is crucial for safety during your workouts, helping you stay fit and healthy right at home.
Key Takeaways
- Select a suitable location with solid steel studs to ensure secure mounting of your folding rack for home workouts.
- Utilize a stud finder to accurately locate and mark the positions of the steel studs, ensuring a reliable foundation for your equipment.
- Prepare spacer blocks to accommodate any wall protrusions, and select appropriate fasteners based on your wall type for optimal support.
- Distribute weights evenly across the rack to enhance stability and safety during your workouts, allowing you to focus on your fitness goals.
- Regularly inspect and tighten all screws and bolts to maintain ongoing security and reliability, ensuring your home gym remains a safe space for exercise.
Selecting the Right Location for Your Rack
When selecting the right location for your wall-mounted folding rack, how can you ensure it meets all your home workout needs?
Start by choosing a spot that provides ample space for your exercises, making sure the bottom connector remains clear of outlets or trim. Measure your ceiling height and the length of the rack uprights to determine the best placement for the connector.
It’s crucial to ensure that the wall can support the weight of the rack by aligning the mounting brackets with solid steel studs. If the uprights don’t align with the studs, consider adding a stringer for additional support.
Finally, don’t forget to check for overhead clearance to accommodate various movements during your workouts.
Finding and Marking Studs
After you’ve chosen the perfect spot for your wall-mounted folding rack in your home gym, the next crucial step is to find and mark the studs in your wall.
Use a stud finder to accurately locate the steel studs behind the drywall, as they’re essential for securely mounting your equipment. If you don’t have a stud finder, you can gently knock on the wall to listen for a solid sound that indicates a stud, or make careful exploratory cuts in the drywall.
Mark these locations with a pencil or masking tape, creating horizontal marks where the mounting brackets will attach. This ensures proper alignment with the studs, providing a stable and safe setup for your workout equipment.
Preparing Spacer Blocks for Alignment
To ensure that your wall-mounted folding rack aligns perfectly with your home gym setup, it’s essential to prepare spacer blocks that accommodate any wall protrusions.
Use plywood or wood for these blocks, ensuring they’re cut to match the thickness of the protrusions for stable alignment. Pre-drilling holes in the spacer blocks will make installation smoother, allowing screws to turn freely without gripping the wood.
Once prepared, you might want to seal them with house paint to match your wall color, giving your gym area a polished look.
Don’t forget to wear safety glasses and a dust mask while drilling to protect yourself from debris and dust inhalation.
This attention to detail will help create a safe and functional exercise space at home, supporting your fitness journey.
Choosing the Appropriate Fasteners
With your spacer blocks ready for alignment, the next step involves selecting the right fasteners to securely mount your wall-mounted folding rack, ensuring a safe and effective workout environment.
For heavy loads, it’s best to opt for lag bolts that are approximately 3/8 inch thick, which will guarantee your squat rack remains stable during use. If you’re attaching to wood, long self-tapping screws (100mm+) work effectively to provide that extra hold.
For those using plasterboard, toggle bolts offer added support to prevent any sagging. When mounting to concrete or cinder block, be sure to choose masonry screws or concrete anchors instead of drywall screws, as the latter may not be able to withstand the weight.
Always match the fasteners to the size of the holes in the squat rack mounting plates for a secure fit, ensuring your home gym is both functional and safe for your fitness journey.
Installing the Mounting Boards
To begin installing your mounting boards for a sturdy home gym setup, first locate the studs in your wall using a stud finder. Mark their positions accurately to ensure precision before cutting any drywall or mounting boards.
Opt for 2×4 lumber for the mounting boards, as this size provides ample support for your squat rack. Securely attach the mounting boards to metal studs using long self-tapping screws (100mm+), and consider incorporating toggle bolts for added strength if you’re working with plasterboard.
Before fastening the screws, drill pilot holes for each one to prevent wood splitting and ensure a solid connection.
For enhanced stability in your home gym, install additional vertical 2x4s from floor to ceiling, ensuring that all screws penetrate deeply into the metal studs for maximum strength. This will help you create a safe and reliable space for your workouts, supporting your fitness journey at home.
Anchoring the Rack Securely
Securing your wall-mounted folding rack is crucial for ensuring safety and stability during your home workouts. To achieve this, use lag screws and make sure to drill bolt holes accurately. For those using steel studs, opt for long self-tapping screws (100mm+), utilizing six to eight screws for each 2x. If you’re mounting through plasterboard, toggle bolts will provide additional stability. For concrete walls, masonry screws or anchors are the best choice—steer clear of drywall screws. Be sure to pre-drill holes for precise alignment, making the installation process smoother. It’s also a good practice to regularly inspect all mounting points for any signs of wear or loosening, and consider adding safety straps for heavier loads to enhance your workout safety.
| Surface Type | Recommended Fasteners |
|---|---|
| Steel Studs | Long self-tapping screws |
| Plasterboard | Toggle bolts + self-tapping |
| Concrete | Masonry screws/anchors |
| Wood | Lag screws |
Final Adjustments and Checks
Before you start using your wall-mounted folding rack, it’s essential to make final adjustments and checks to ensure everything is in perfect working order for your home gym.
First, verify that all bolts and screws are tightly secured to prevent any wobbling during your workouts.
Check that the folding mechanism operates smoothly without dragging against the wall or floor, allowing for easy transitions between exercises.
Inspect the vertical posts and mounting anchors for security and signs of wear, tightening any loose pivot pins or bolts as necessary to maintain stability.
Finally, confirm that all safety straps are properly in place, especially when loading heavy items, to enhance safety during your fitness routines.
These simple steps can help you create a stable and secure environment for achieving your health and fitness goals at home.
Safety Considerations During Use
When using your wall-mounted folding rack, regular maintenance checks are crucial for ensuring safety during your workouts.
Always make sure that the fasteners are secure and can support your exercise load, inspecting them for any signs of wear or loosening.
Additionally, maintaining a clear area around the rack is important to prevent accidents and allow for safe movement during your routines.
Prioritizing these safety considerations will help you stay healthy and enjoy your home workouts to the fullest.
Regular Maintenance Checks
To ensure a safe and effective workout experience with your wall-mounted folding rack, it’s crucial to conduct regular maintenance checks. Here are some key inspections to perform:
- Screws and Bolts: Check these weekly for tightness and signs of wear. Loose hardware can lead to instability during workouts.
- Rack Stability: Before each use, examine the rack for any wobbling or movement that could indicate a need for adjustments.
- Weight Capacity: Monitor the weight limits of your mounting hardware on a monthly basis, especially when you’re changing weights to avoid exceeding capacity.
- Folding Mechanism: Ensure the folding mechanism operates smoothly and without dragging. This should be checked monthly to prevent operational issues.
- Surrounding Area: Keep the area around your rack clear of obstacles and hazards. This should be checked weekly to promote a safe exercise environment.
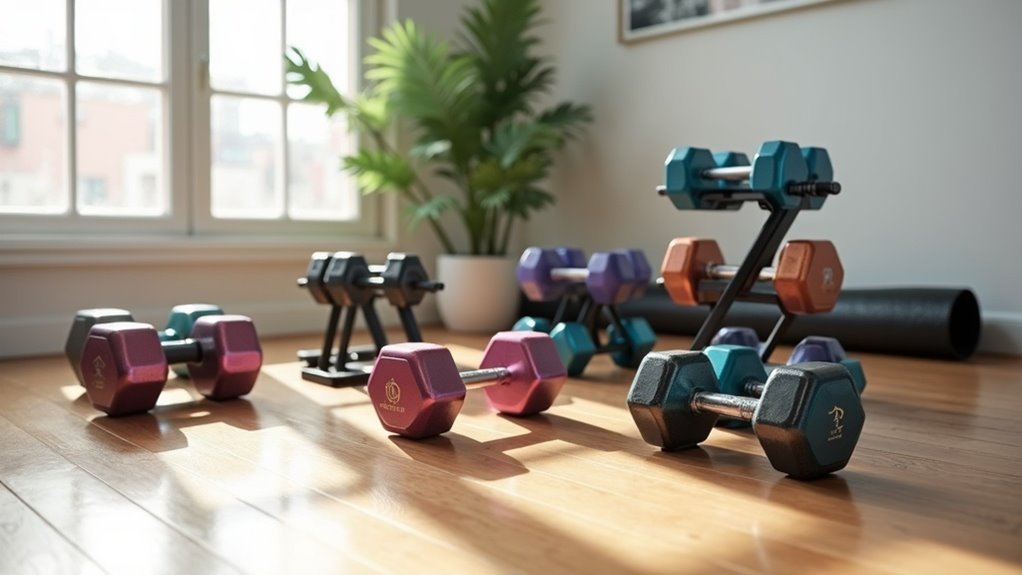
Proper Weight Distribution
Proper weight distribution is essential for maintaining the stability and safety of your wall-mounted folding rack, especially when you’re maximizing your home gym experience.
To ensure you’re lifting safely and effectively, keep these tips in mind:
- Balance the load evenly: Distributing weights uniformly across the rack will help prevent tipping and enhance safety during your workouts.
- Secure attachment: Use six to eight self-tapping screws per wooden 2×4 to ensure a strong and stable setup for your home gym.
- Regular maintenance: Frequently inspect and tighten all screws and bolts to keep your equipment secure and reliable.
- Utilize safety features: Implement safety straps or braces to manage forward torque during heavy lifts, ensuring you stay safe while pushing your limits.
Secure Fastener Inspection
When utilizing your wall-mounted folding rack for home workouts, it’s essential to conduct regular inspections of all fasteners to ensure they remain secure and dependable. Check screws, bolts, and anchors for any signs of wear or loosening, as inadequate fasteners can compromise the stability of your exercise setup. Make sure lag screws and toggle bolts penetrate deeply into studs or concrete to provide optimal strength for your workouts.
| Fastener Type | Inspection Focus | Weight Rating |
|---|---|---|
| Screws | Look for wear/looseness | Verify weight limit |
| Bolts | Ensure deep penetration | Confirm stability |
| Anchors | Check smooth folding mechanism | Test integrity |
Regular inspections are key to preventing accidents and ensuring that your rack remains safe and reliable for your home gym activities. Stay committed to your fitness journey with confidence!