To align your treadmill belt for optimal performance at home, start by checking for even gaps on both sides of the belt and ensure that it lifts about 2 to 3 inches at the center. If you notice any drifting or leaning, it’s time to adjust the tension. Use an Allen wrench to make small adjustments to the roller bolts: turning them clockwise will shift the belt to the left, while counterclockwise will move it to the right. After making adjustments, test the alignment by running the treadmill at 3 mph and watch for any signs of drift. For more tips on maintaining your treadmill and ensuring the best workout experience, be sure to explore additional resources. Stay fit and healthy from the comfort of your home gym!
Key Takeaways
- Begin by checking the position of your treadmill belt; ensure there are even gaps on both sides and that the belt lifts 2 to 3 inches in the center for optimal performance.
- Utilize an Allen wrench to make necessary adjustments to the roller bolts; turn clockwise to shift the belt left and counterclockwise to move it right, ensuring your workout remains smooth and uninterrupted.
- Test the belt alignment by running the treadmill at a steady 3 mph, paying close attention to any drifting or misalignment that could affect your exercise routine.
- Listen for any unusual noises during operation, as these may indicate misalignment that requires your attention to maintain a safe and effective workout environment.
- Make it a habit to regularly monitor the belt’s position and tension to prevent uneven wear, ensuring that your home gym equipment remains reliable and promotes your health and fitness goals.
What to Look For?
When evaluating the alignment of your treadmill belt, there are several key factors to consider to ensure your home gym equipment is functioning optimally.
First, check for even gaps on both sides of the running belt; misalignment can lead to uneven stretching and potential damage, impacting your workout experience.
Check for even gaps on both sides of the treadmill belt to prevent damage and enhance your workout experience.
Observe whether the belt leans towards one side, as this indicates a need for tension adjustment to maintain balance during your exercises.
Ensure that the belt lifts between 2 to 3 inches in the center during testing; if it lifts more than 4 inches, it’s time to tighten it for better performance.
Additionally, pay attention to any unusual noises during operation, as these may signal misalignment that could detract from your fitness routine.
Finally, keep an eye out for any drifting while in motion, which suggests the belt needs adjustment for proper tracking, allowing you to focus on your fitness goals without distractions.
Signs You Need to Adjust Your Treadmill Running Belt
When it comes to maintaining your home gym equipment, it’s crucial to pay attention to the signs that your treadmill running belt needs adjustment.
If you notice the belt drifting to one side, showing uneven wear patterns, or feeling like it’s slipping underfoot, these are clear indicators of misalignment.
Addressing these issues promptly won’t only enhance your treadmill’s performance but also ensure your safety while exercising at home.
Keeping your equipment in top shape is essential for achieving your fitness goals effectively and efficiently.
Belt Drift Symptoms
Identifying symptoms of belt drift is essential for ensuring your treadmill operates at peak performance and remains safe for your workouts at home.
If you notice your running belt consistently shifting to the left or right, this indicates misalignment and requires you to adjust the treadmill belt. A slipping sensation beneath your feet often signals improper belt tension and alignment, which should be addressed promptly.
Additionally, if the belt stalls or struggles to move, it’s crucial to check both tension and alignment to prevent further complications.
Regularly monitoring the belt’s position is key; consistent drift suggests that adjustments are necessary to avoid uneven wear and ensure a safer, more efficient workout experience for both men and women looking to stay healthy through exercising at home.
Uneven Wear Patterns
How can you tell if your treadmill belt needs adjusting? Keep an eye out for uneven wear patterns, such as fraying or thinning on one side.
These signs indicate misalignment that requires your immediate attention. If the belt drifts to one side while you’re exercising, it’s a clear signal of misalignment, which could lead to further damage.
Regularly checking the condition of your belt can help you catch these issues early. To correct the alignment, you may need to loosen the belt and then adjust the treadmill to ensure it’s centered while in use.
Proper adjustments not only extend the life of your treadmill belt but also create a safer workout environment, allowing you to focus on achieving your fitness goals from the comfort of your home gym.
Slipping or Skipping
When using your treadmill at home, if you notice the belt starts slipping or skipping, it’s a clear indication that some adjustments are needed for optimal performance.
First, check the belt tension; it should lift about 2 to 3 inches in the center. If it lifts more than that, the belt is too loose, which can lead to instability during your workout. Additionally, if the belt drifts to the left or right, you’ll need to make alignment adjustments to keep your workouts safe and effective.
It’s essential to regularly monitor the belt tension, as the rubber can stretch over time with consistent use.
To correct any slipping issues, you can adjust the rear roller tension screws in quarter-turn increments until the belt feels secure and stable.
Tools Required for Adjustment
To adjust your treadmill belt effectively and keep your home workout routine running smoothly, you’ll need an Allen wrench and a 13 mm wrench.
These essential tools allow you to make precise adjustments to the belt’s tension and alignment, ensuring optimal performance during your workouts.
Keeping your tools in good condition guarantees that you’re always ready to maintain your treadmill and stay committed to your fitness goals at home.
Essential Tools Needed
Having the right tools on hand is crucial for effectively aligning your treadmill belt, an important step in maintaining your home gym equipment.
You’ll need an Allen wrench, which is usually included with your treadmill, to make adjustments to the bolts at the rear. This tool is essential for managing both the tension and alignment of the belt.
Additionally, a 13 mm wrench may be required for more significant adjustments, particularly when it comes to tightening a loose belt.
Utilizing the proper tools ensures your treadmill operates at its best, maintaining optimal tension without being too tight or too loose.
This straightforward maintenance not only enhances the functionality and safety of your treadmill but also supports your fitness journey at home, helping you stay healthy and active.
Proper Tool Usage
Proper tool usage is crucial for maintaining your home gym equipment, particularly when it comes to adjusting your treadmill belt for optimal performance.
To make precise adjustments to the tension of the running belt, use the provided Allen wrench. For more significant changes, you may need a 13 mm wrench to tighten or loosen the adjustment bolts that control the rear roller tension.
Always refer to your user manual to verify the specific tools required for your treadmill model, as variations may exist.
Maintenance Equipment Importance
Using the right tools for treadmill maintenance is crucial to ensure optimal performance and longevity, especially for those committed to their home workouts.
An Allen wrench and a 13 mm wrench are essential for making precise adjustments to belt tension and alignment. Properly maintained equipment prevents misalignment and slipping during use, allowing you to focus on your fitness goals without interruptions.
By regularly maintaining your treadmill with these tools, you can significantly extend its lifespan, keeping the belt well-tensioned and aligned for safe and effective workouts.
To keep your treadmill in top shape, you’ll also need:
- Allen wrench
- 13 mm wrench
- Screwdriver
- Lubricant
- Cleaning cloth
Using these tools effectively enables you to make necessary adjustments and maintain your treadmill in ideal condition, ensuring that your home gym remains a reliable space for your fitness journey.
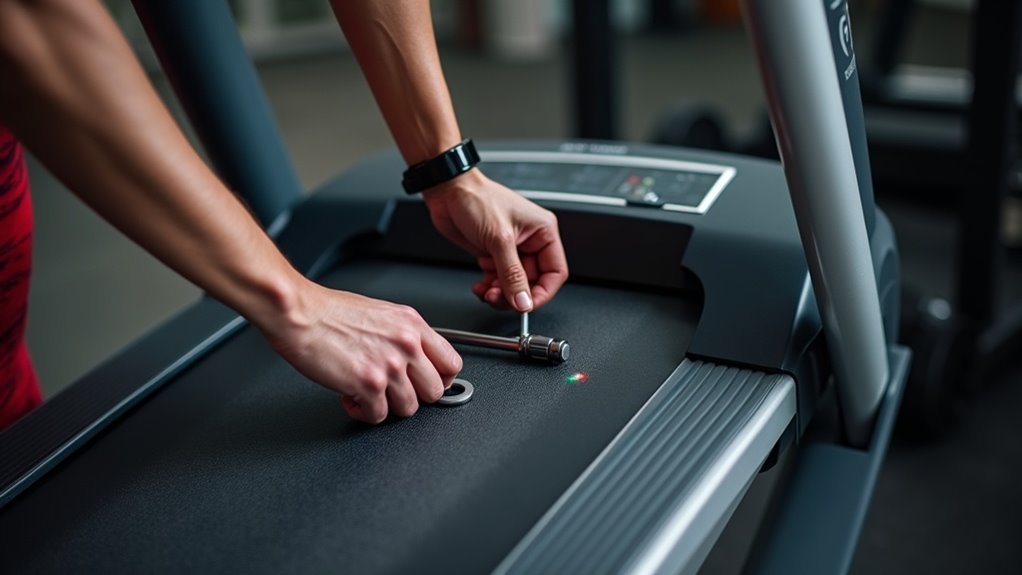
Procedure for Alignment Adjustment
Before you start adjusting your treadmill belt, ensure that the machine is turned off and unplugged for your safety.
To begin, set the treadmill to a speed of 3 mph to observe how the belt moves. Pay attention to which side the belt tends to drift towards.
On the side where the drift occurs, adjust the roller bolt by turning it clockwise to shift the belt left or right, or counterclockwise to move it away from that side.
It’s important to make small adjustments of ¼ to ½ turns at a time, monitoring the belt’s position until it’s centered on the deck.
Once you’ve completed the adjustments, test the treadmill again at 3 mph to confirm that the belt stays centered without drifting during your workout.
This will help ensure a smooth and effective exercise experience in your home gym.
Aligning the Belt – Part One
Once you’ve confirmed that the treadmill belt is centered using the adjustment process previously detailed, it’s time to align the belt correctly.
Start by turning off the treadmill and disconnecting it from the power source. Utilize the Allen Wrench to turn the left and right side adjustment bolts one full turn clockwise.
- Monitor the belt’s position after each adjustment to ensure it remains centered.
- Adjust both sides evenly for optimal alignment and performance.
- Ensure the treadmill is placed on a stable, level surface for safety.
- Conduct a test run at 3-5 mph to check how the belt moves.
- Verify that there’s proper tension on the running deck for a smooth workout experience.
Following these steps will help you achieve the ideal belt alignment, allowing you to enjoy your home workouts to the fullest.
Aligning the Belt – Part Two
To effectively align the treadmill belt in your home gym, begin by setting the machine to a speed of 3-5 mph and carefully observing the belt’s position on the running deck. If you notice the belt drifting, adjustments to the tension will be necessary.
| Drift Direction | Adjustment Steps |
|---|---|
| Right | Turn the right adjustment 1/2 turn clockwise; turn the left adjustment 1/2 turn counterclockwise. |
| Left | Turn the left adjustment 1/2 turn clockwise; turn the right adjustment 1/2 turn counterclockwise. |
| Final Check | Retest at a slower speed to ensure the belt remains centered. |
Make sure that adjustments are equal on both sides to prevent any further drifting. Keeping your treadmill in top condition will help you achieve your fitness goals from the comfort of your home.
Benefits of Proper Adjustment
Proper adjustment of your treadmill belt is essential for a safe and effective home workout experience.
Properly adjusting your treadmill belt is crucial for a safe and effective workout at home.
Ensuring the belt is aligned correctly offers a range of benefits for both men and women looking to stay fit at home:
- Decreases the likelihood of slips and falls, significantly lowering the risk of injury
- Prolongs the lifespan of your treadmill by minimizing wear on the motor
- Facilitates smoother operation, providing consistent resistance for a better workout
- Creates a quieter running experience, allowing you to focus on your fitness goals
- Enhances overall performance, helping you stay motivated and achieve your health objectives